How to Fix a Leaking Bath Tap: A Step-by-Step Guide for Homeowners
A leaking bath tap may seem like a small inconvenience, but over time, it can waste gallons of water, raise your utility bills, and even lead to water damage around your tub. Whether it’s a slow drip or a steady trickle, knowing how to fix a leaking bath tap can save you money and prevent future plumbing headaches. In this guide, we’ll walk you through everything you need to know—from the causes of bath tap leaks to the tools you’ll need and the step-by-step repair process.
Why Is My Bath Tap Leaking?
Understanding why your bath tap is leaking is the first step toward a proper fix. The most common reason is a worn-out washer or cartridge, especially in older tap models. Over time, these internal components can break down due to constant use, mineral buildup, or corrosion. Leaks can also be caused by damaged O-rings, loose parts, or a buildup of limescale around the valve. In some cases, it may be a faulty tap seat or a more serious issue within your plumbing system.
How to Identify the Type of Bath Tap
Before you start repairs, it’s important to identify what kind of bath tap you have. The two most common types are:
- Compression Taps – These use washers to control the flow of water and are usually the culprit when it comes to worn-out parts.
- Ceramic Disc Taps – These are more modern and use a rotating disc mechanism rather than washers.
Knowing your tap type helps determine whether you’ll be replacing a washer or a cartridge. If you’re unsure, a quick visual inspection when the tap is disassembled will give you the answer.
Tools and Supplies You’ll Need
Fixing a leaking bath tap is a manageable DIY job if you have the right tools and supplies. Here’s a basic list:
- Adjustable spanner or wrench
- Screwdrivers (flathead and Phillips)
- Replacement washers or ceramic cartridges
- Plumber’s grease
- Cloth or rag to cover chrome surfaces
- Allen key (for some handle types)
- PTFE (Teflon) tape
- A bucket or towel to catch any residual water
Once you’ve gathered your tools, you’re ready to fix the problem.
Step-by-Step: How to Fix a Leaking Bath Tap
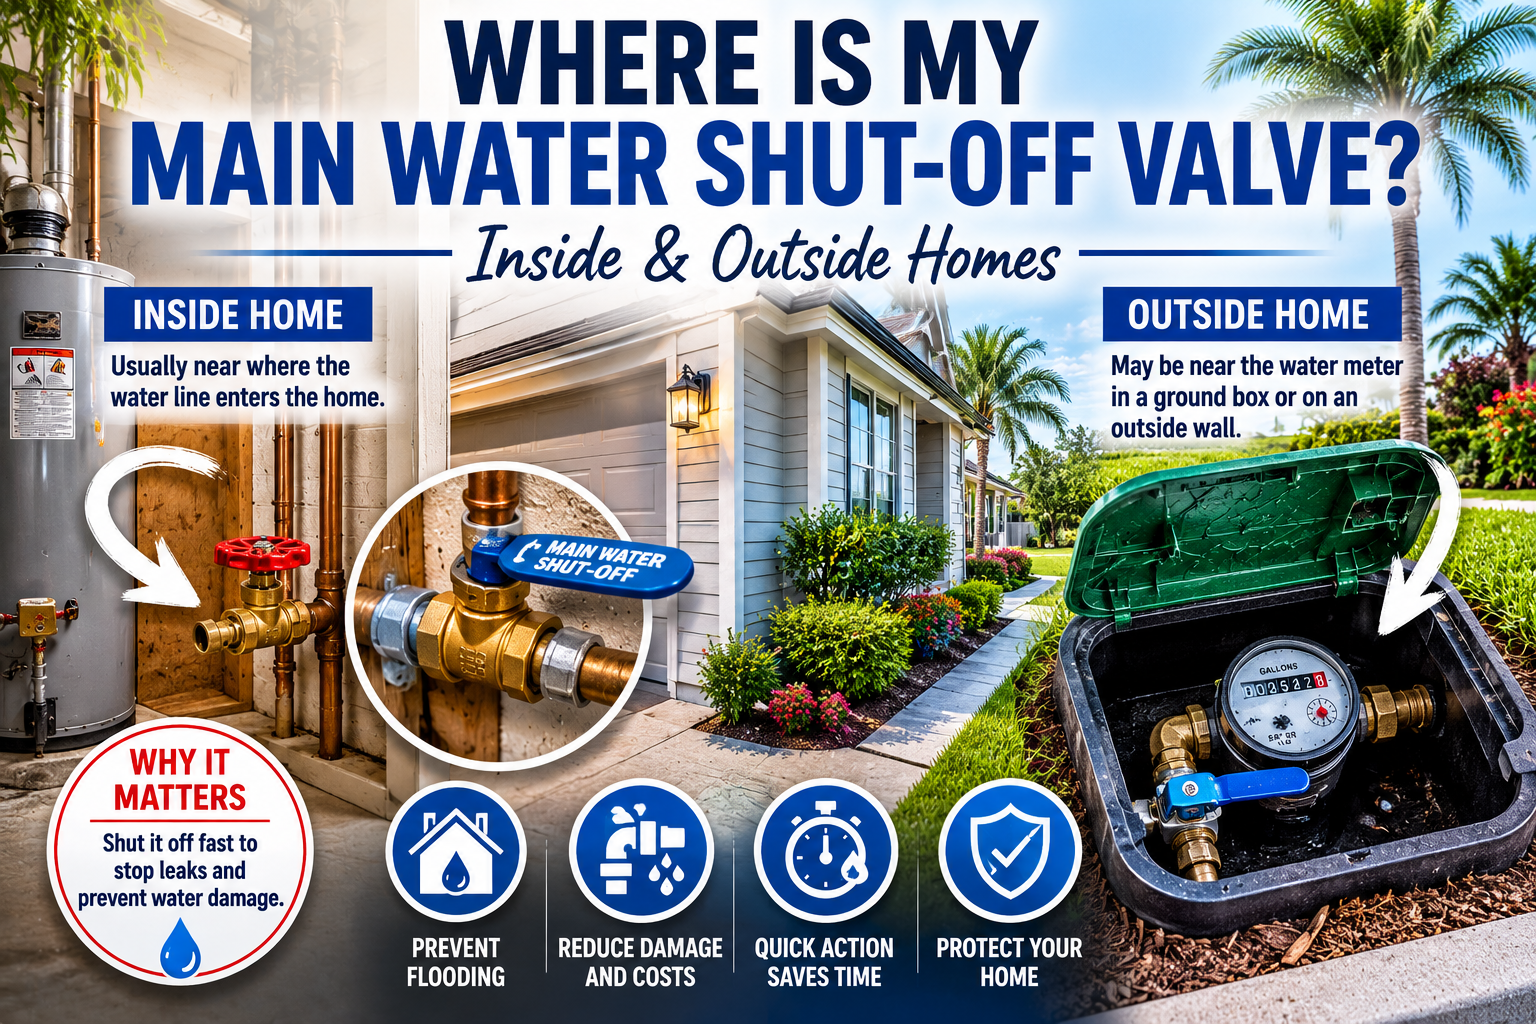
- Turn Off the Water Supply
Safety first—before doing any plumbing work, make sure you turn off the water supply to your bath. This is usually done at the isolation valve near the tap or the main water shut-off for the house. Once the water is off, turn the tap on to drain any remaining water from the pipe. - Plug the Drain
Use a plug or cloth to block the drain. This keeps small screws or washers from falling into the pipes. - Remove the Tap Handle
Most handles are secured with a small screw, often hidden under a cap or cover. Use an Allen key or screwdriver to loosen it. Once removed, pull the handle off gently. - Unscrew the Tap Cover and Access the Valve
Beneath the handle is a cover or shroud—this can often be unscrewed by hand or using a wrench (with a cloth to protect the chrome). Once removed, you’ll see the tap valve or cartridge assembly. - Inspect and Replace the Washer or Cartridge
Use your wrench to unscrew the valve. Check the washer at the bottom of the valve or inspect the ceramic cartridge for damage. If it’s cracked, stiff, or worn out, replace it with a new one that matches the make and model of your tap. Apply plumber’s grease to the new washer or cartridge to ensure smooth operation. - Reassemble the Tap
Once the replacement part is installed, reassemble the tap in the reverse order. Tighten everything snugly, but don’t overtighten—this can damage components. - Turn the Water Supply Back On and Test
Slowly turn the water supply back on and test the tap. The leak should be gone, and the tap should turn on and off smoothly.
How to Fix a Leaking Bath Tap Without Replacing It
Sometimes, a tap leak can be fixed without a full replacement of parts. Mineral buildup around the valve seat or minor corrosion may simply need cleaning. After removing the valve, inspect the seat inside the tap body. If you notice rough spots or scale buildup, gently clean it with steel wool or a descaling solution. Just be cautious not to scratch any sealing surfaces. Reseating tools are also available if the seat needs a bit of resurfacing.
When to Replace the Entire Tap
If your bath tap is old, corroded, or continues to leak even after replacing the washer or cartridge, it might be time to replace the entire tap unit. Modern taps are more efficient, stylish, and often easier to maintain. If you’re experiencing recurring issues or water leaks from the base of the tap body (not just the spout), upgrading to a new tap is often the most cost-effective and long-term solution.
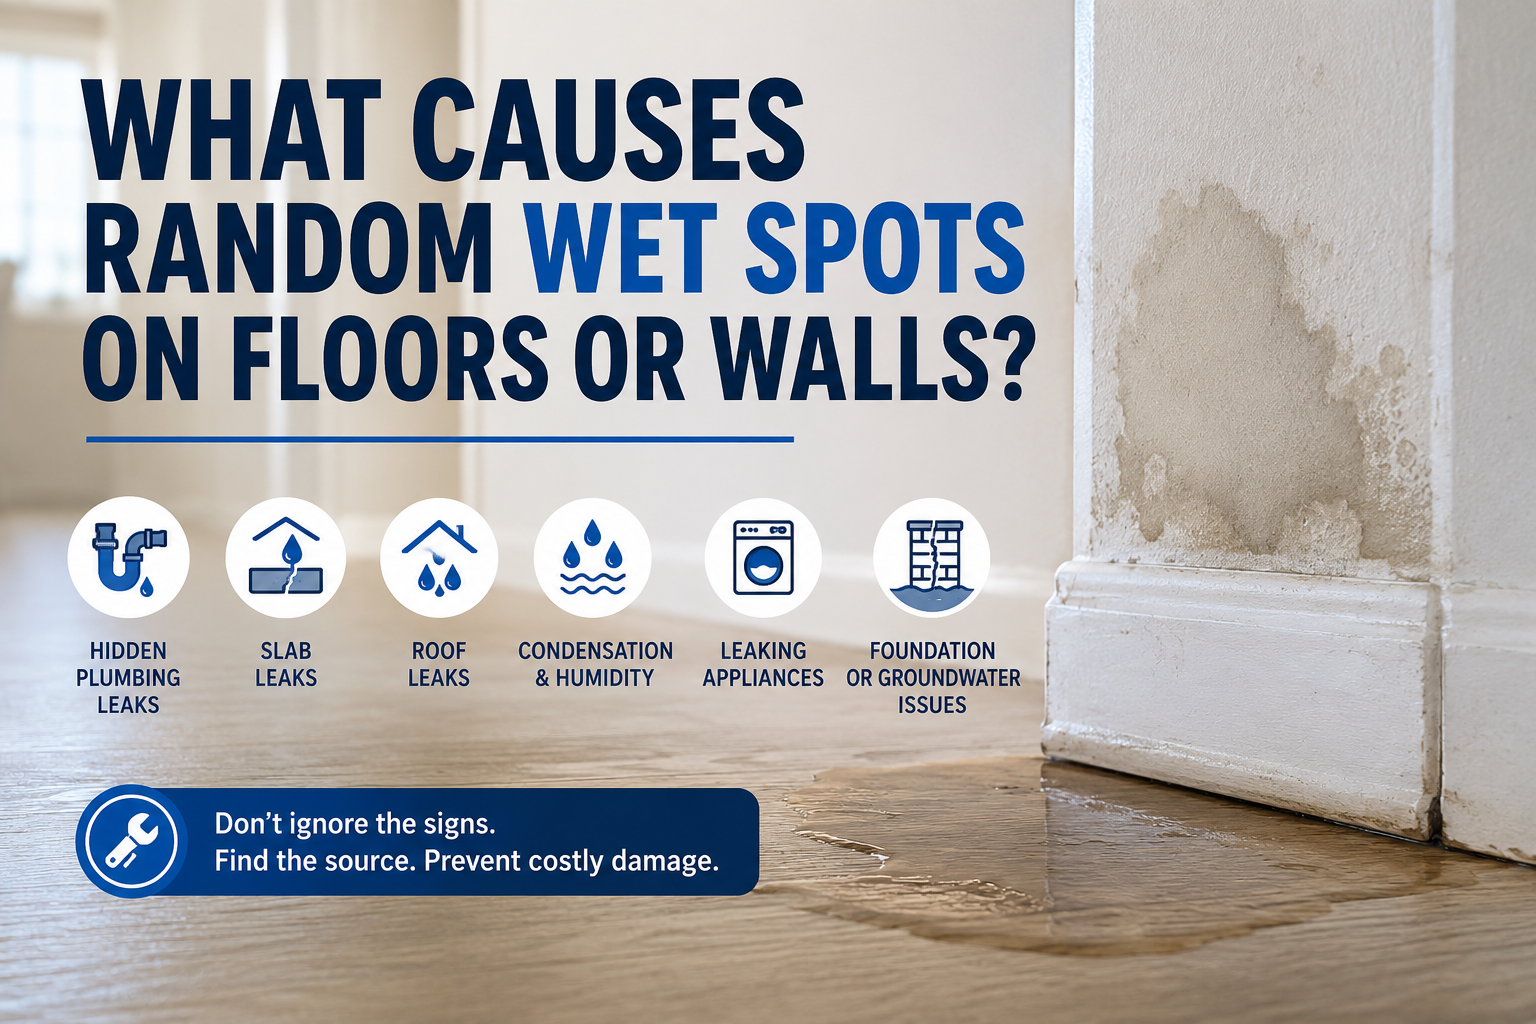
How to Detect a Leak Behind the Bath Tap
Sometimes what appears to be a leaking bath tap could actually be water seeping from behind the tap or around the tub fixture. Run your hand around the base of the tap and where the pipes connect behind it. If it feels wet even when the tap hasn’t been used recently, you might have a hidden plumbing leak behind the wall. This is a more serious issue that may require the help of a licensed plumber to inspect and repair.
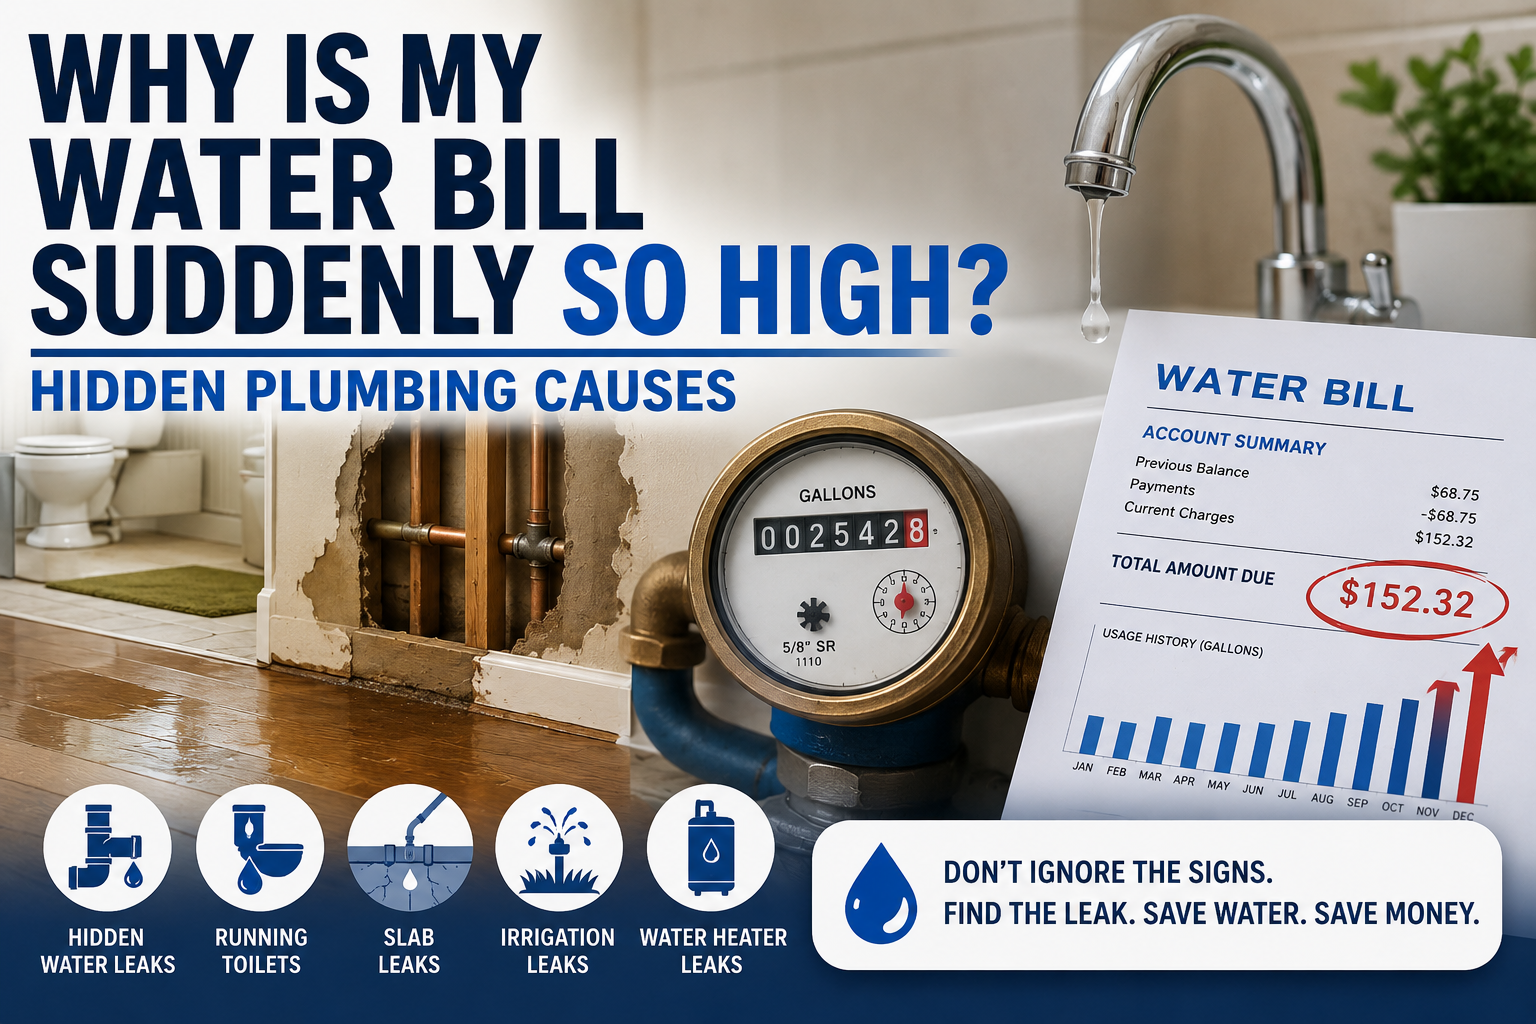
Can a Leaking Bath Tap Cause Damage?
Yes—a small leak can cause big problems over time. Water dripping behind tiles or down into the bath frame can weaken walls, grow mold, and damage flooring. If left unchecked, these types of leaks can become costly to repair. That’s why learning how to fix a leaking bath tap quickly can protect both your plumbing system and your home’s structure.
Preventing Future Leaks
Once your tap is fixed, a few simple habits can help prevent future leaks. Don’t overtighten taps when turning them off—this puts pressure on washers and can cause premature wear. Regularly clean your taps to prevent limescale buildup. If you live in an area with hard water, consider installing a water softener to reduce mineral deposits that cause valve damage over time.
When to Call a Professional Plumber
If you’ve gone through all the steps and your bath tap still leaks, or if you’re uncomfortable handling plumbing work on your own, don’t hesitate to call a professional. At Doug Herrell Plumbing, we’ve been serving homeowners in Melbourne, Palm Bay, Viera, and surrounding areas for years. Whether it’s a simple washer replacement or a full bathroom plumbing upgrade, we’ll help you fix it right the first time.
Learning How To Fix A Leaking Bath Tap
Learning how to fix a leaking bath tap is a practical and worthwhile skill for any homeowner. With just a few tools and the right steps, you can stop that annoying drip, reduce your water bill, and extend the life of your plumbing fixtures. Whether you take the DIY route or bring in an expert, the important thing is to act quickly before a small issue becomes a major problem. If you’re in Brevard County and need fast, reliable help with leaking taps or any plumbing issues, Doug Herrell Plumbing is here to help.
What’s Next?
Doug Herrell Plumbing is a trusted leader in Brevard County, Florida, specializing in slab leak detection and re-piping services. Call us today for a free estimate before a slab leak causes unnecessary damage to your property.
About Doug Herrell Plumbing – lic#CFC 048487
Doug Herrell Plumbing has been Brevard County’s source for plumbing services since 1980. We are a family owned and operated business and take tremendous pride in providing honest and reliable plumbing services at an affordable price.
CALL 321-254-0004
Serving Melbourne, Palm Bay, Viera, Suntree, Titusville, Merritt Island, Melbourne Beach, Indialantic, Indian Harbour Beach, Cape Canaveral, Satellite Beach, Rockledge, West Melbourne, Cocoa, and Cocoa Beach.